Stop tabs from refreshing automatically!
Key Takeaways
- Restart the browser and ensure your internet connection is active. Check if the problem affects all tabs or only specific ones.
- Disable automatic tab discarding. Go to chrome://discards/, locate the Auto Discardable tab, and if there’s a checkmark next to the website you don’t want Chrome to discard, click “Toggle” to turn it off.
- Besides that, you can turn off problematic extensions, disable resource-hogging processes, update the browser to the latest version, and reset the browser settings if needed.
Does Chrome automatically refresh opened tabs when you switch to them? Issues such as insufficient system resources, tabs going to sleep, or interference from installed extensions could be causing this problem. Here are some solutions you can try to fix this issue.
Preliminary Checks
Start the troubleshooting process by performing some preliminary checks.
Restart the browser and your device to rule out any temporary bugs. If the issue persists, check the stability of your internet connection to ensure it is not intermittently connecting or disconnecting. Also, clear the browser cache and cookies to prevent them from interfering with its operation.
If these basic troubleshooting steps fail to diagnose or resolve the issue, try the remaining fixes.
Check How Widespread the Issue Is
Check whether the problem persists with a specific tab or affects all opened tabs. Switch to a different tab and check if it refreshes after a while. Also, ensure you are not on a website that automatically refreshes after being idle for some time, like a banking site. If the issue is confined to a particular tab, close and reopen it to rule out any temporary bugs causing an auto-refresh.
You can also attempt to open the website on another browser to confirm whether the issue is specific to Chrome. If the website fails to load on the alternative browser as well, it indicates a potential technical issue with the website. Report the problem to the website administrator or support team in such a case.
The issue is more widespread if the problem extends to all opened tabs, including newly opened ones. In that case, you can move on to the next solution.
Ensure the Refresh Key or Shortcut Isn’t Pressed
If Chrome continuously auto-refreshes a tab upon opening, ensure the refresh key or its shortcut on your keyboard, typically F5 on Windows or Command+R on macOS, isn’t stuck. To eliminate this possibility, press the refresh key (or shortcut) and make sure no debris is stuck inside.
If the key is not stuck, ensure the key hasn’t gone bad, which might trigger an automatic webpage refresh. Go to the keyboard tester website and start the test to confirm if the refresh key registers automatically. If it does, the key is likely faulty. In that case, you should turn off the key or shortcut.
Disable Automatic Tab Discarding
If your browser tabs refresh only when switching to them after prolonged idle periods, you must stop them from going to sleep.
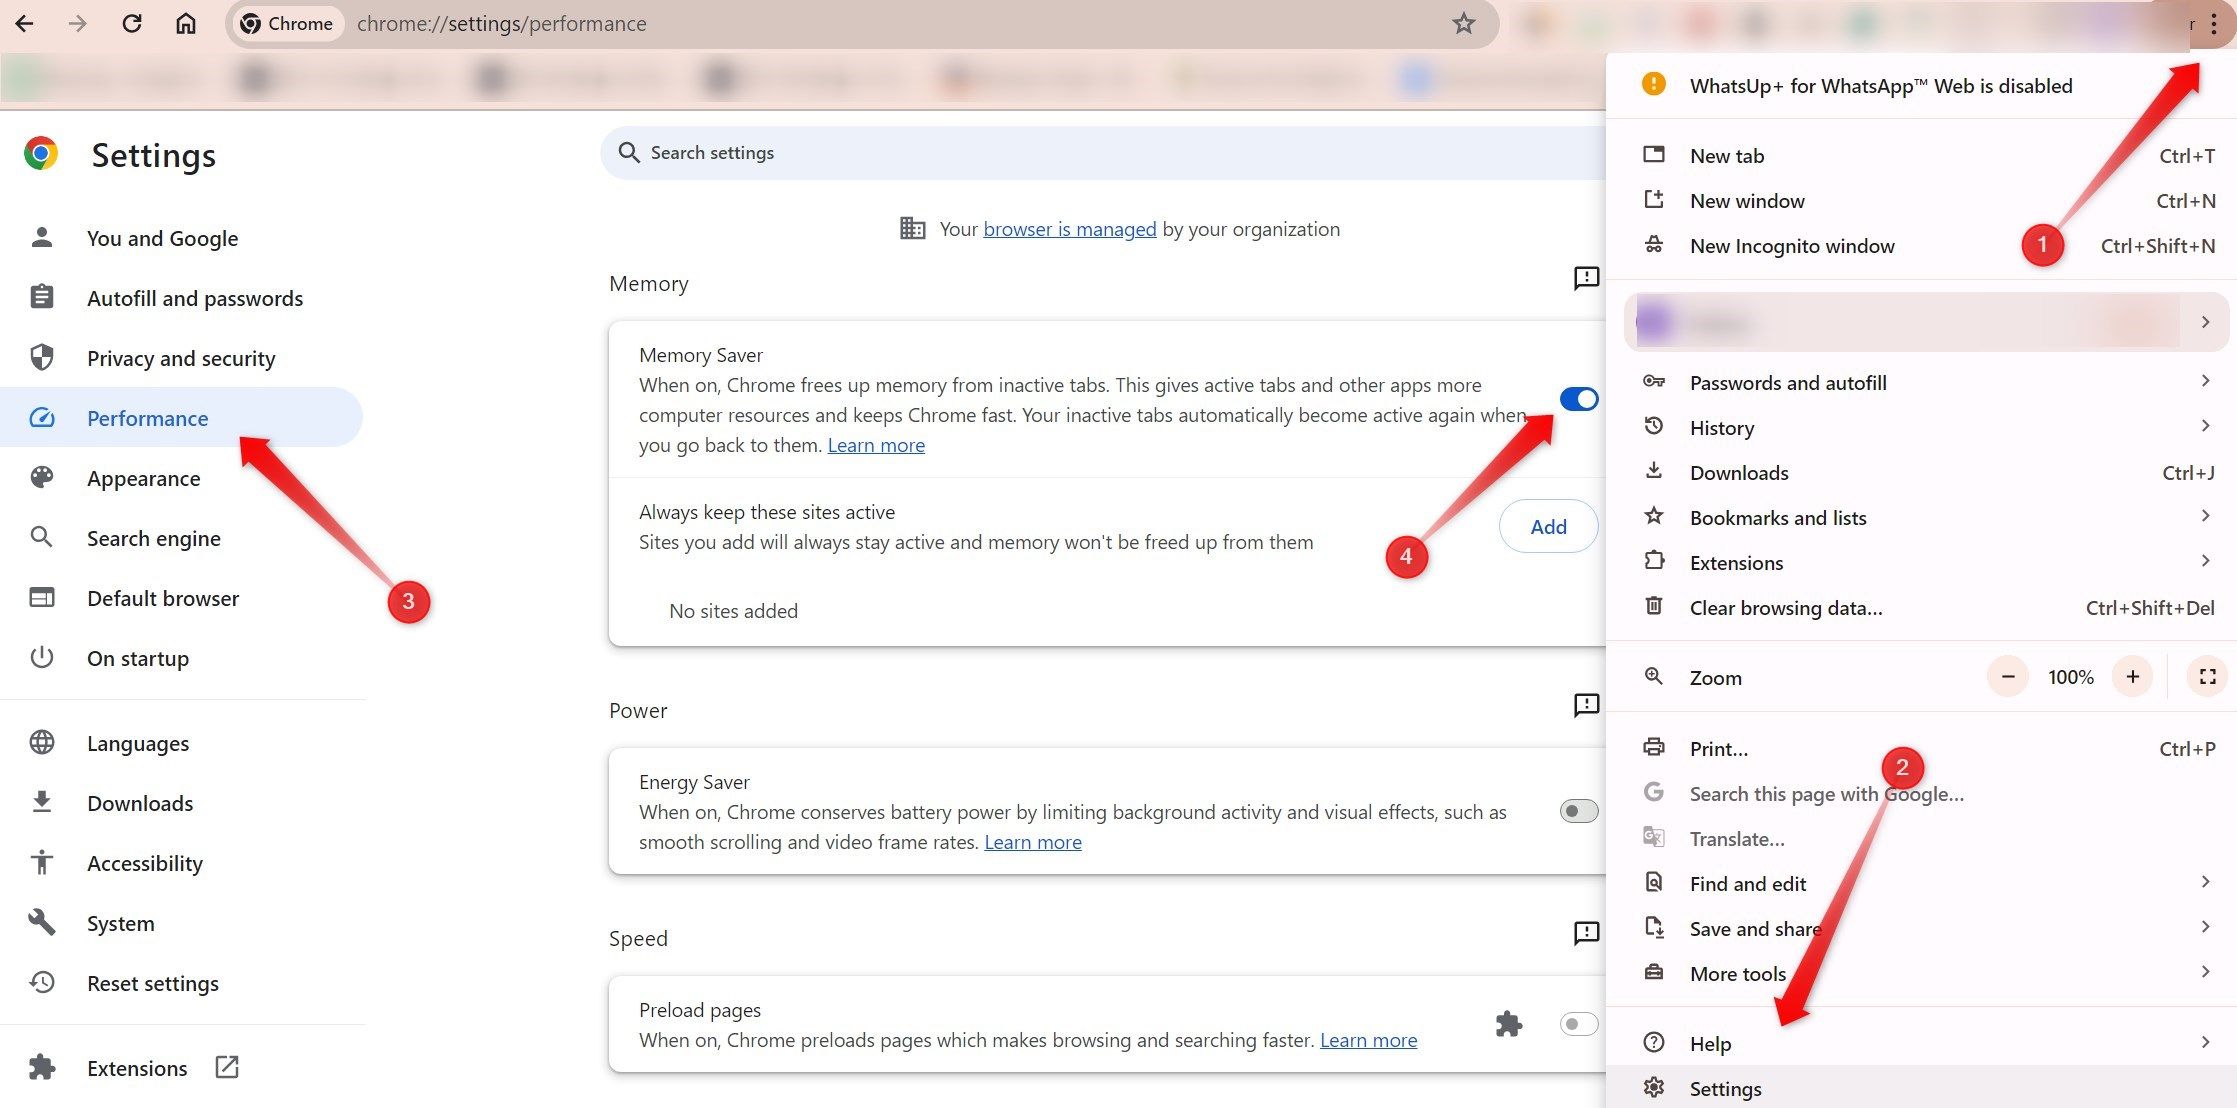
One option is to turn off Chrome’s Memory Saver feature, which puts inactive tabs to sleep to save memory. To turn it off, click three vertical dots in the top-right corner, select “Settings,” navigate to the “Performance” tab on the left, and toggle off the Memory Saver option.
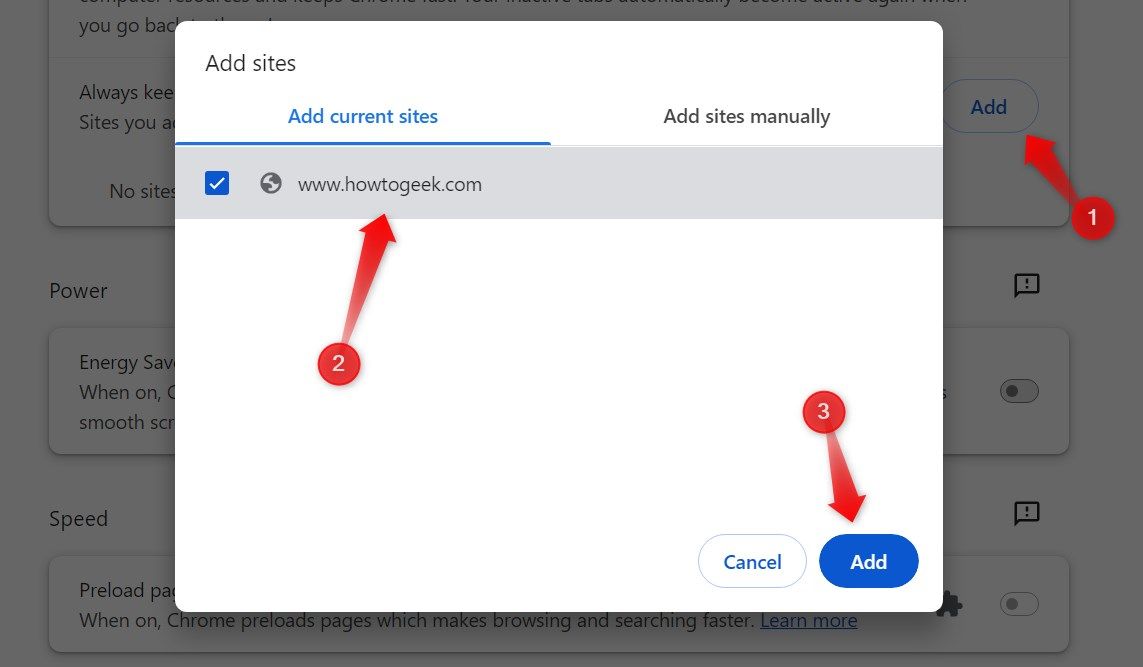
If you prefer to keep memory saving enabled but want to exempt specific web pages, you can manually whitelist them. Click on the “Add” button next to Always Keep These Sites Active, select the desired website from those already opened, or manually enter its URL, and click “Add.”
Alternatively, you can turn off auto-discarding directly from Chrome’s Discards page. Visit chrome://discards/ and locate the Auto Discardable tab. If there’s a checkmark next to the website you don’t want Chrome to discard, click “Toggle” to turn off auto-discarding.
Check for Extension Interference
If you have installed any extensions to auto-refresh tabs, like those used to appear active on freelance platforms, they may interfere with other open tabs. So, temporarily turn off any such extensions. Click on the three vertical dots in the top-right corner, then navigate to Extensions > Manage Extensions. Turn off the toggle located below the problematic extension.
If you don’t have such an extension installed, check other installed extensions that could potentially cause the issue. Turn off each extension one by one, and if the problem resolves after turning off a specific extension, that extension is likely causing the issue. Consider permanently removing that extension from your browser.
Free Up System Resources
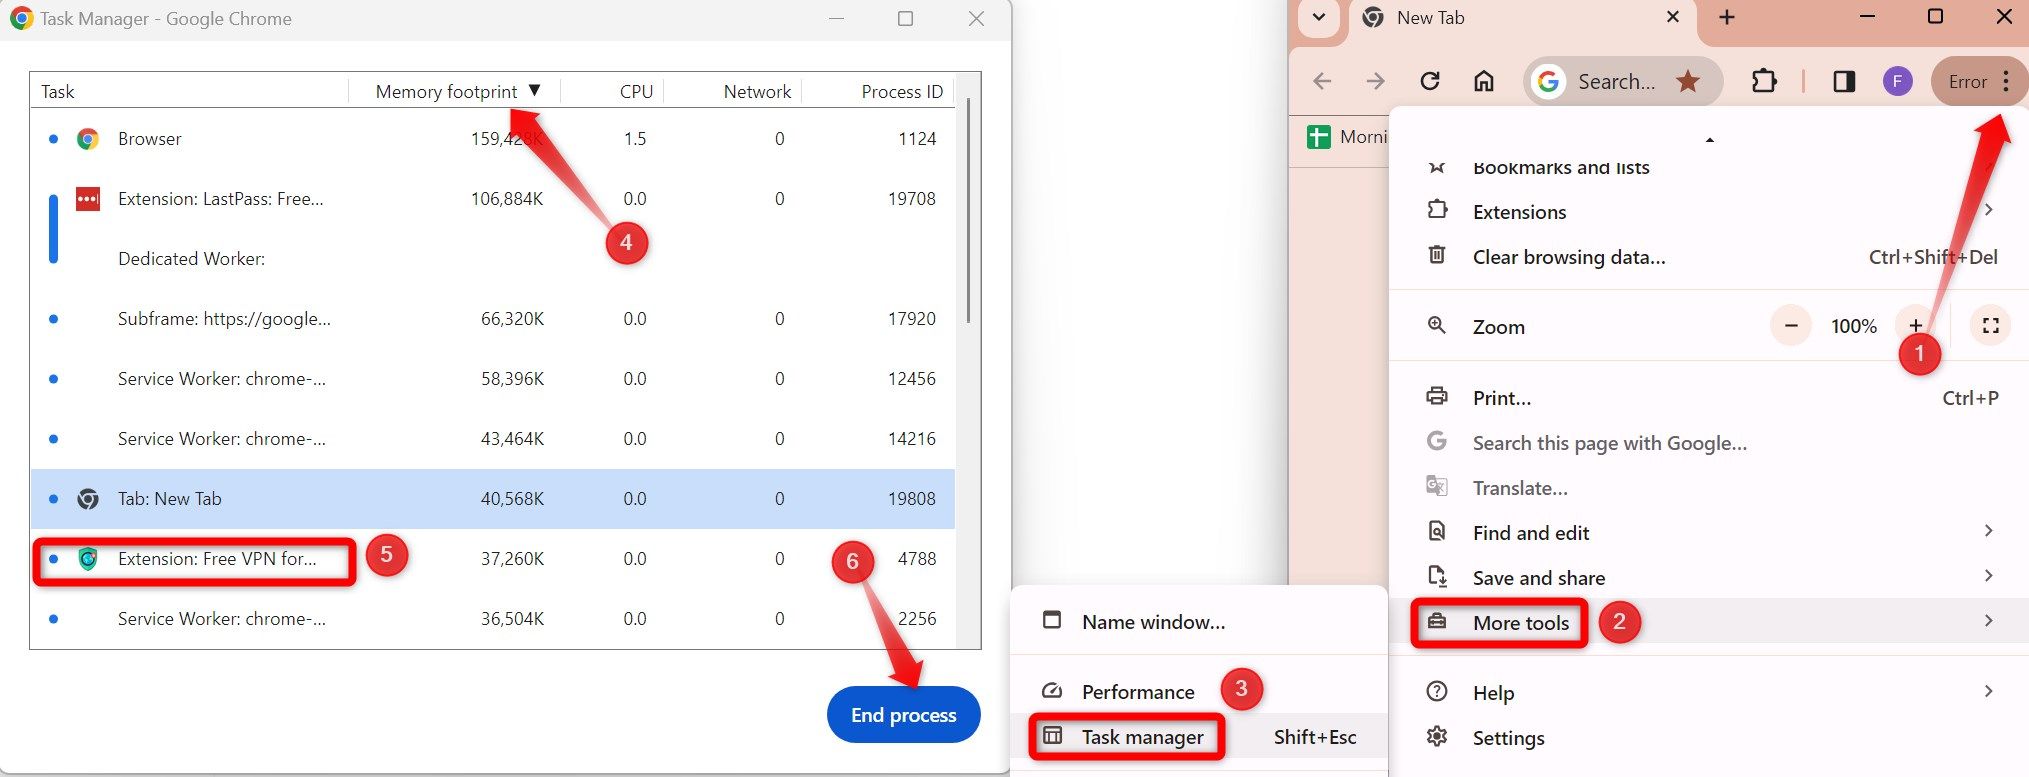
A lack of system resources can also cause Chrome to exhibit abnormal behavior. To rule out this possibility, determine which processes are resource intensive and avoid running them simultaneously. To check these processes, click on the three vertical dots in the top-right corner, then navigate to More Tools > Task Manager.
Click (or double-click) on the “Memory Footprint” column to sort tasks by memory usage in descending order. Identify tabs consuming the most computer resources and disable them if necessary. To turn off a process in Chrome’s Task Manager, select it and click the “End Process” button in the bottom-right corner.
Exercise caution when disabling processes, and don’t turn off essential browser processes to avoid affecting your active browser session.
If you use Chrome on your smartphone, close any other apps running concurrently.
Check for Chrome Updates
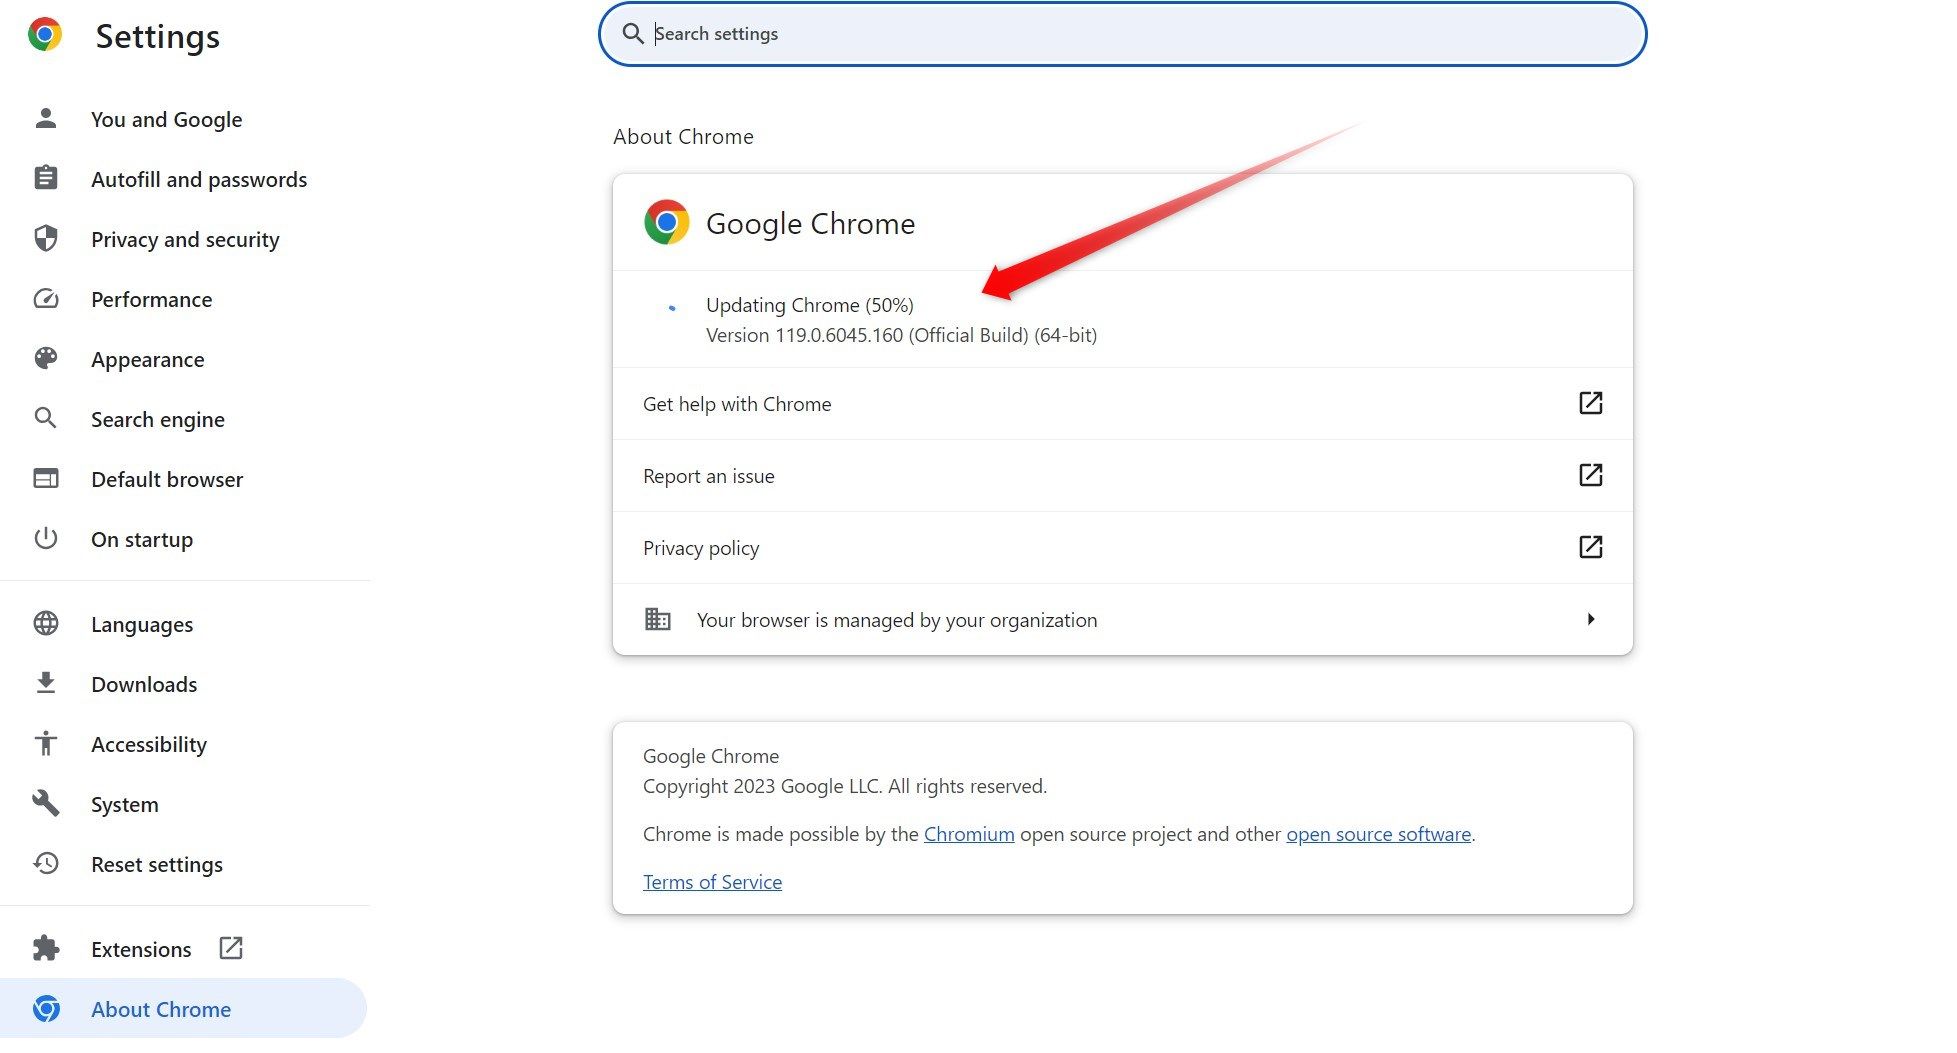
Neglecting to update your browser for an extended period can cause unforeseen issues. To confirm that Chrome is up-to-date, click the three vertical dots in the top-right corner, then navigate to Help > About Google Chrome.
Chrome automatically updates itself if it’s not already on the latest version. After the update is completed, click “Relaunch” to apply the changes.
If you see the message “Chrome Is Up to Date” on the About Chrome page, you’re all set.
On Android, you can update Chrome in the Play Store or enable the auto-update feature that automatically updates all apps, including Chrome.
Reset Chrome Settings
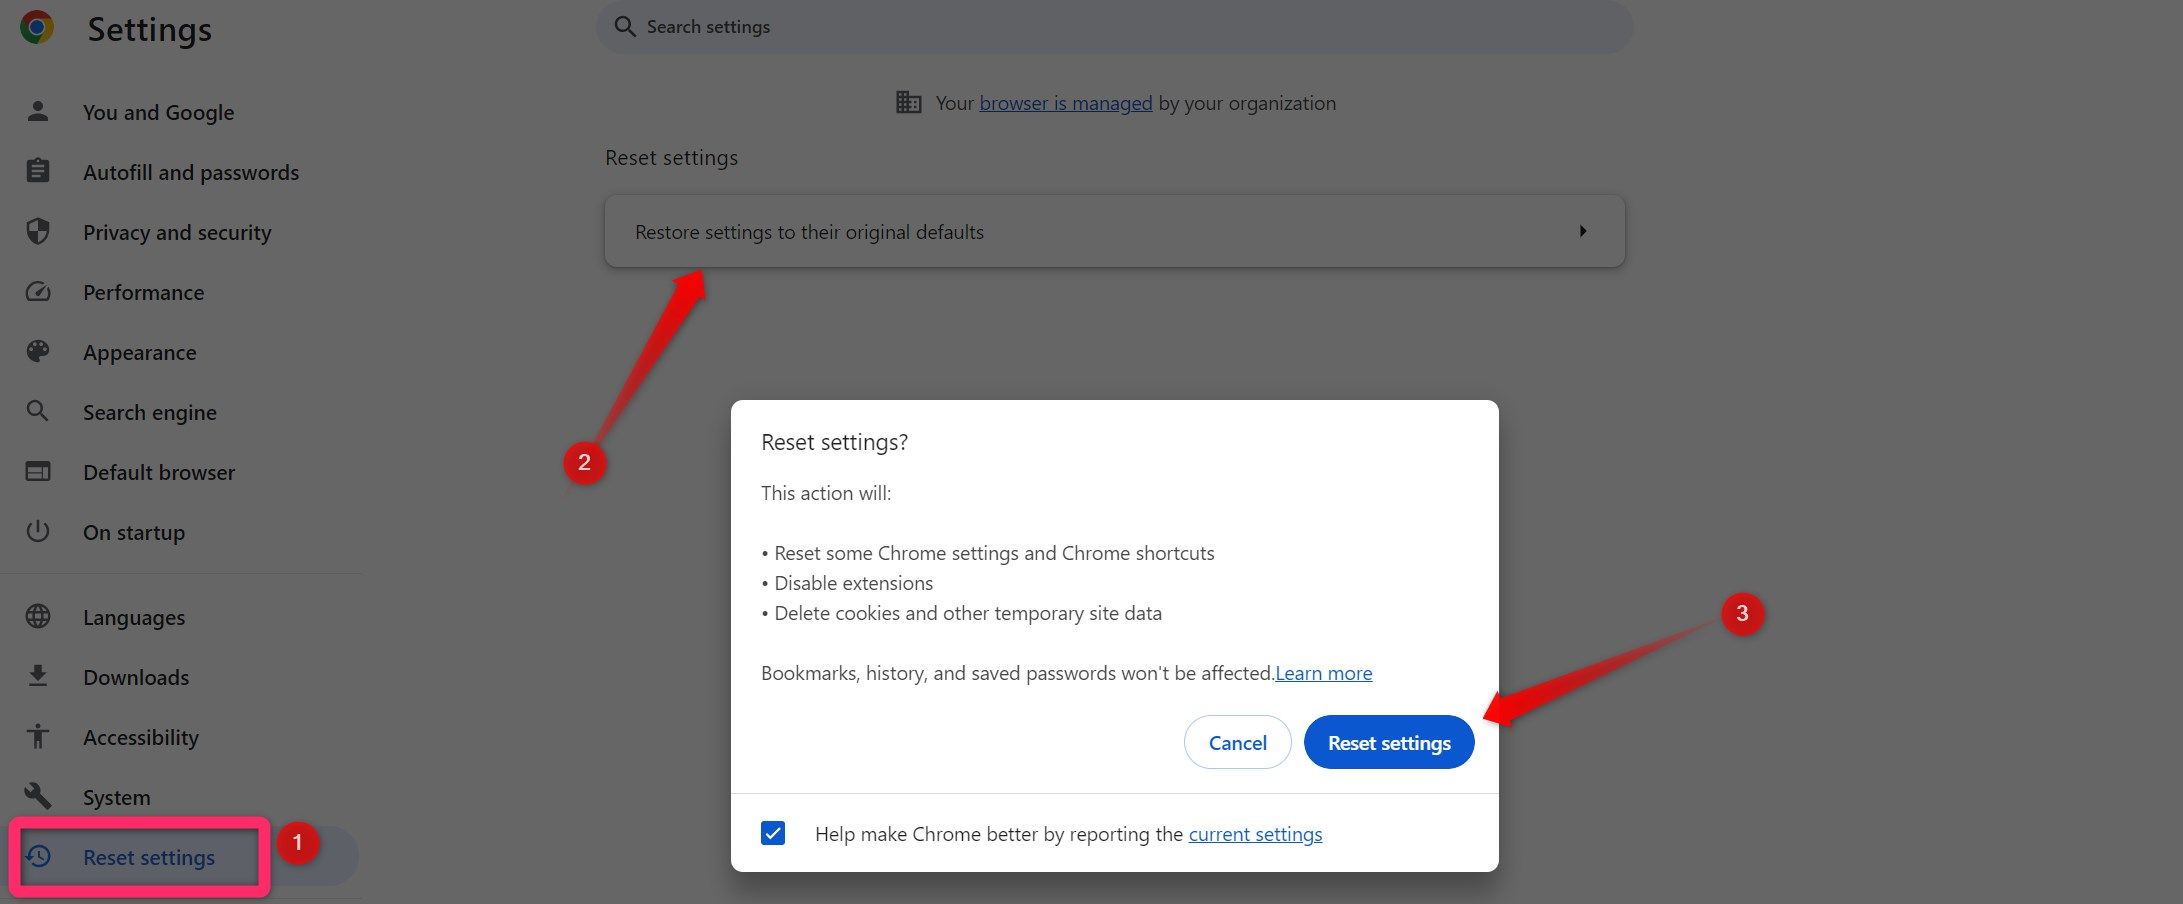
If the previously mentioned solutions haven’t resolved the issue, you can try to reset Chrome settings. Resetting the browser restores its settings to the default configuration, undoing any customizations you’ve made, but often resolves persistent problems. However, consider this option as a last resort when other fixes fail.
To reset Chrome, navigate to “Settings,” then select the “Reset Settings” tab on the left-hand side. Click “Restore Settings to Their Original Defaults” and “Reset Settings” in the pop-up.
The above fixes should have helped you resolve the tab auto-refreshing problem, letting you browse the web smoothly. If none of the fixes work, your last resort should be to uninstall and reinstall Chrome from scratch. If that also fails to work, you always have the option to switch to a trusted or more reliable browser, such as Microsoft Edge.





دیدگاهتان را بنویسید