Grab a screenshot of a full web page or document even when it doesn’t fit on your screen.
macOS has a built-in tool for taking screenshots, but it can only capture what’s actually visible on the screen at any time. What if you need to take a screenshot of an entire web page or lengthy document? Here are the best ways to take scrolling screenshots on a Mac.
Take Full-Page Screenshots in Safari With the Develop Menu
Safari has a hidden screen capture tool that you might not know about. It’s a bit technical, but is accessible to everyone, and if you only need it for occasional use, this is the simplest option to try.
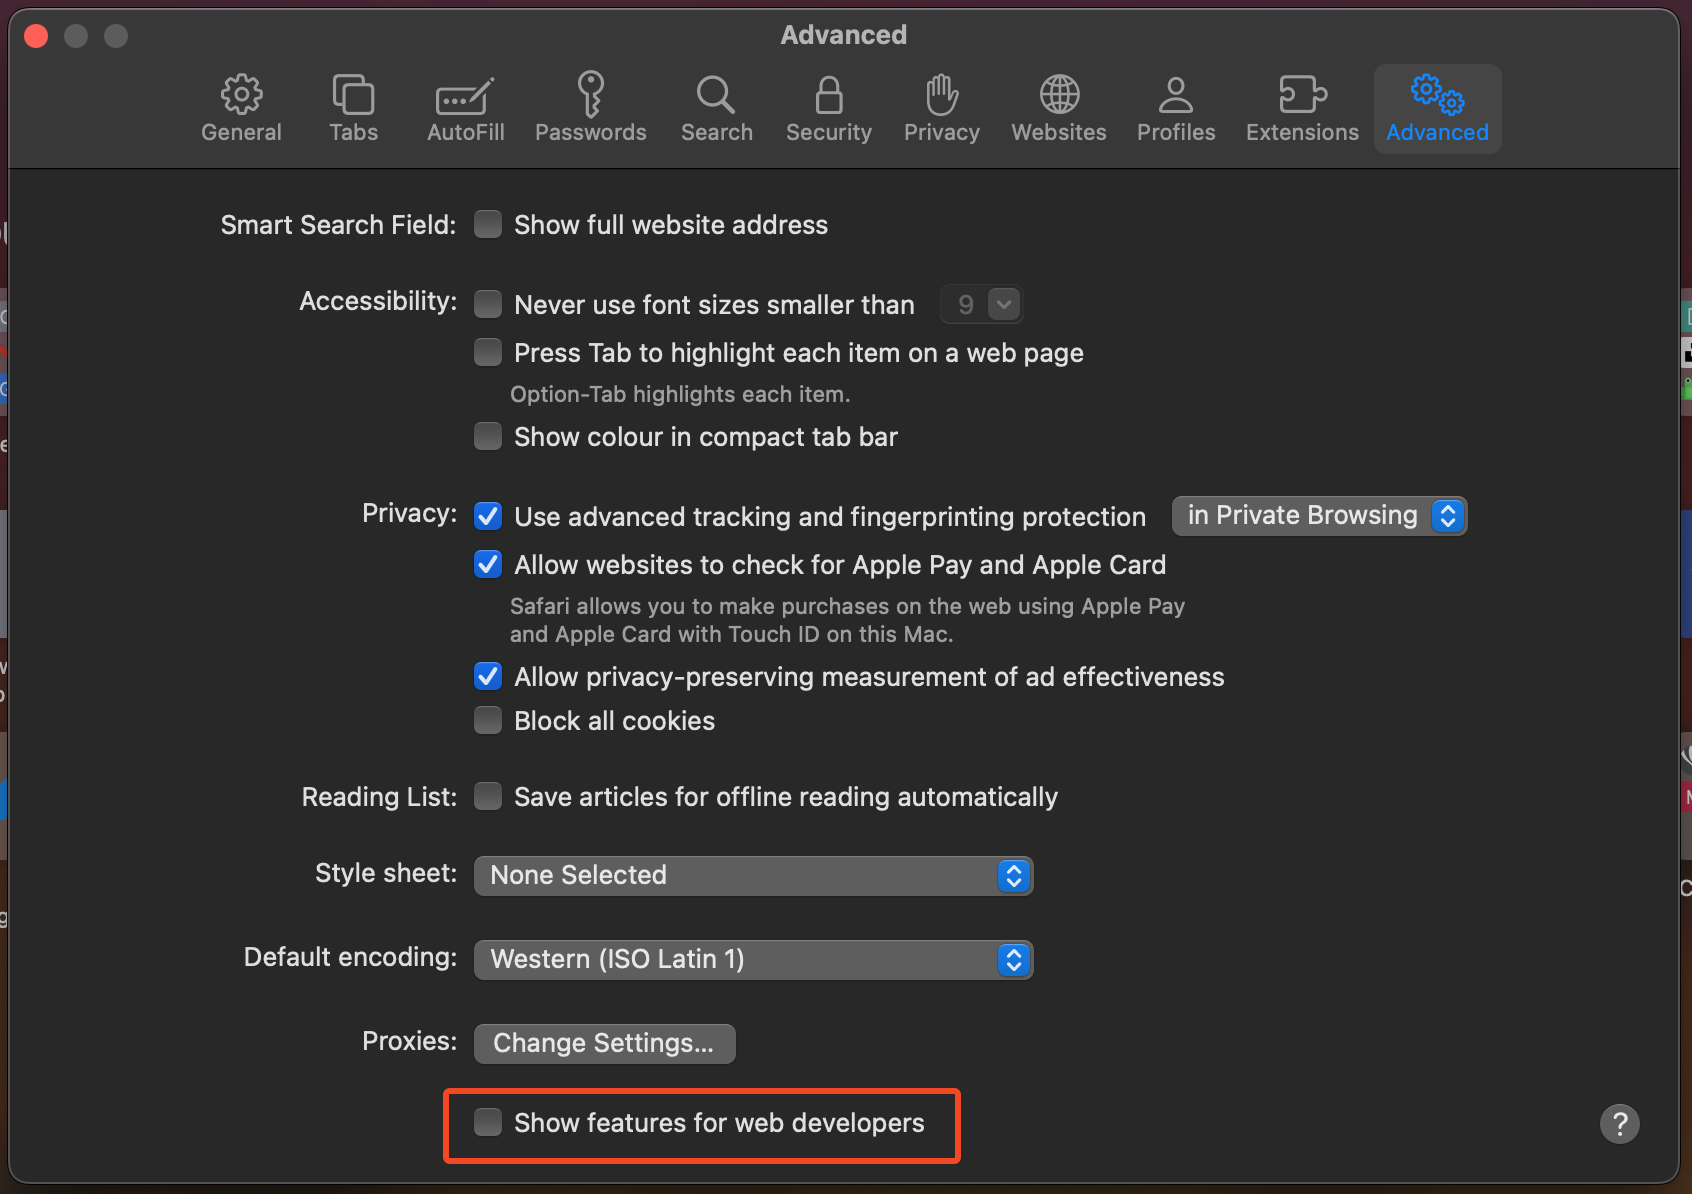
To access the feature, you first need to enable the Developer Settings in Safari. Go to Safari > Settings > Advanced and click “Show Features for Web Developers”.
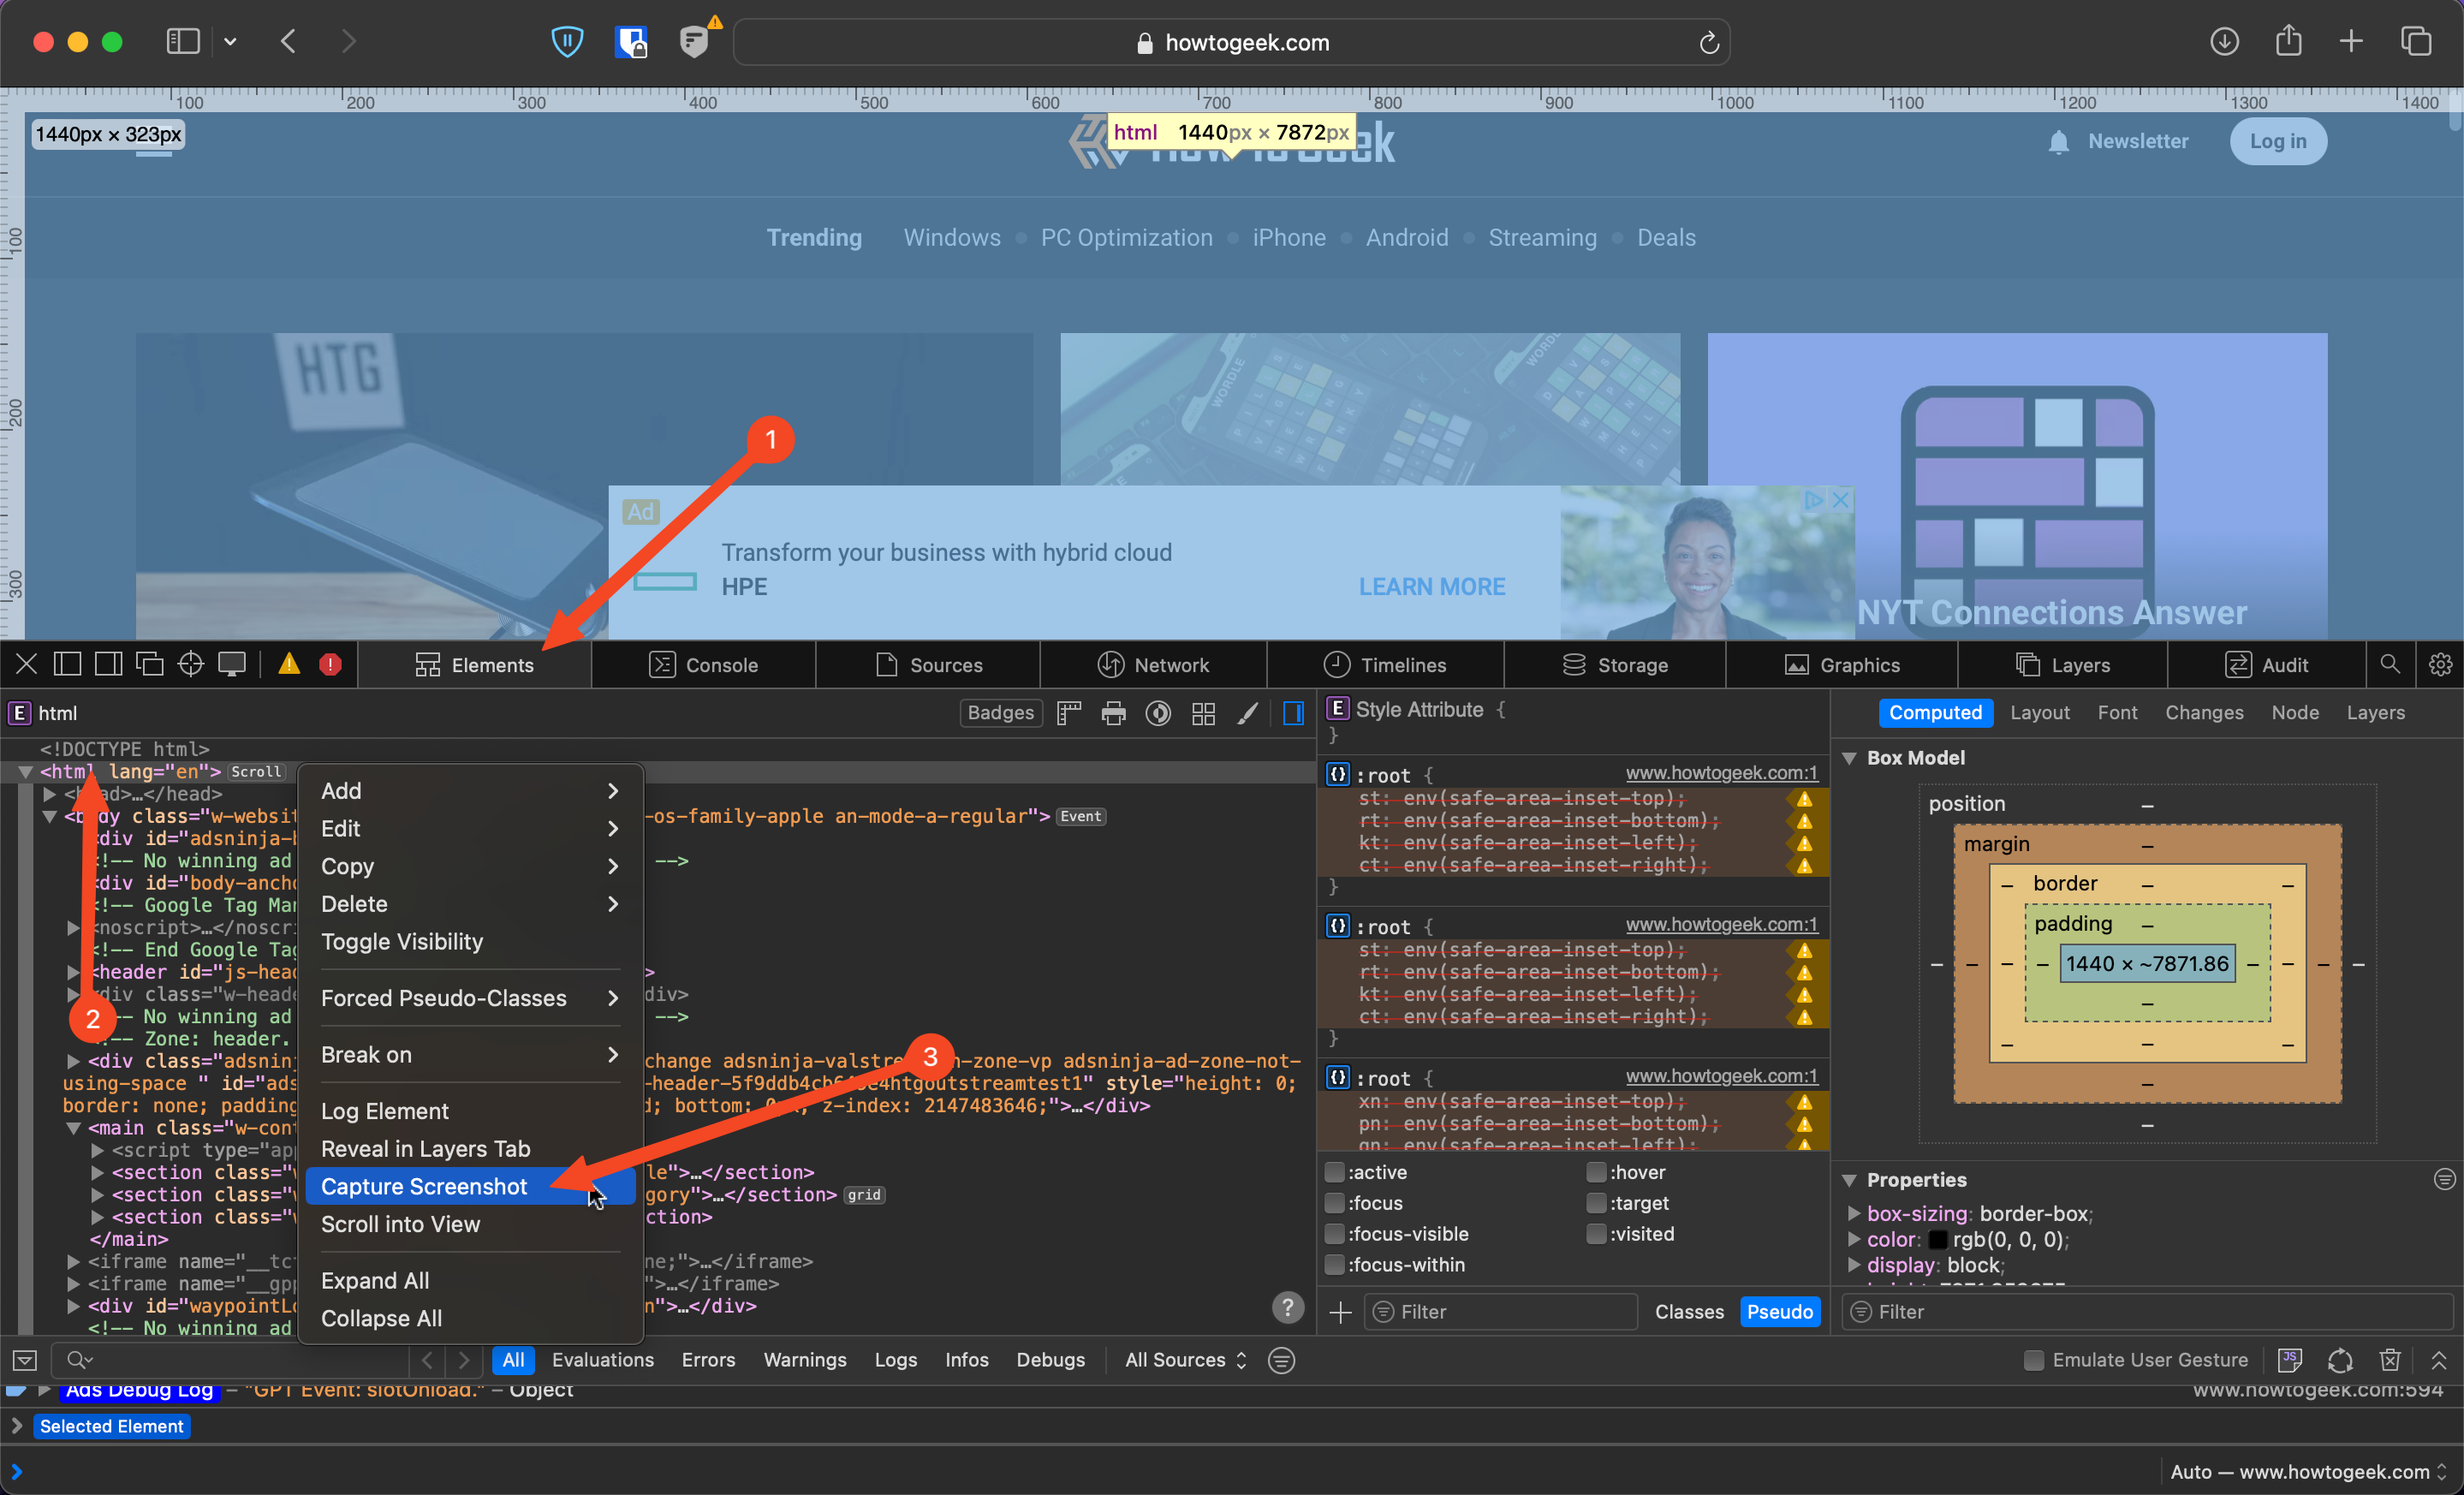
Exit the settings, and you should see that a “Develop” option has appeared in the Safari menu bar. Now load up the web page you want to screenshot and go to Develop > Show Web Inspector. A panel will open at the bottom of the screen. It looks pretty complicated if you aren’t used to it, but don’t be put off—you don’t need to know what any of it means.
To take your screenshot, make sure the Elements tab is selected at the top of the panel. In the code in the left-hand pane, scroll to the top and right-click on the line that begins “html”—it’ll normally be the second line. From the dialog box that opens, click “Capture Screenshot.”
You’ll now be prompted to choose where to save your image. Click “Save” and you’re done.
Take a Scrolling Screenshot With the FireShot Safari Extension
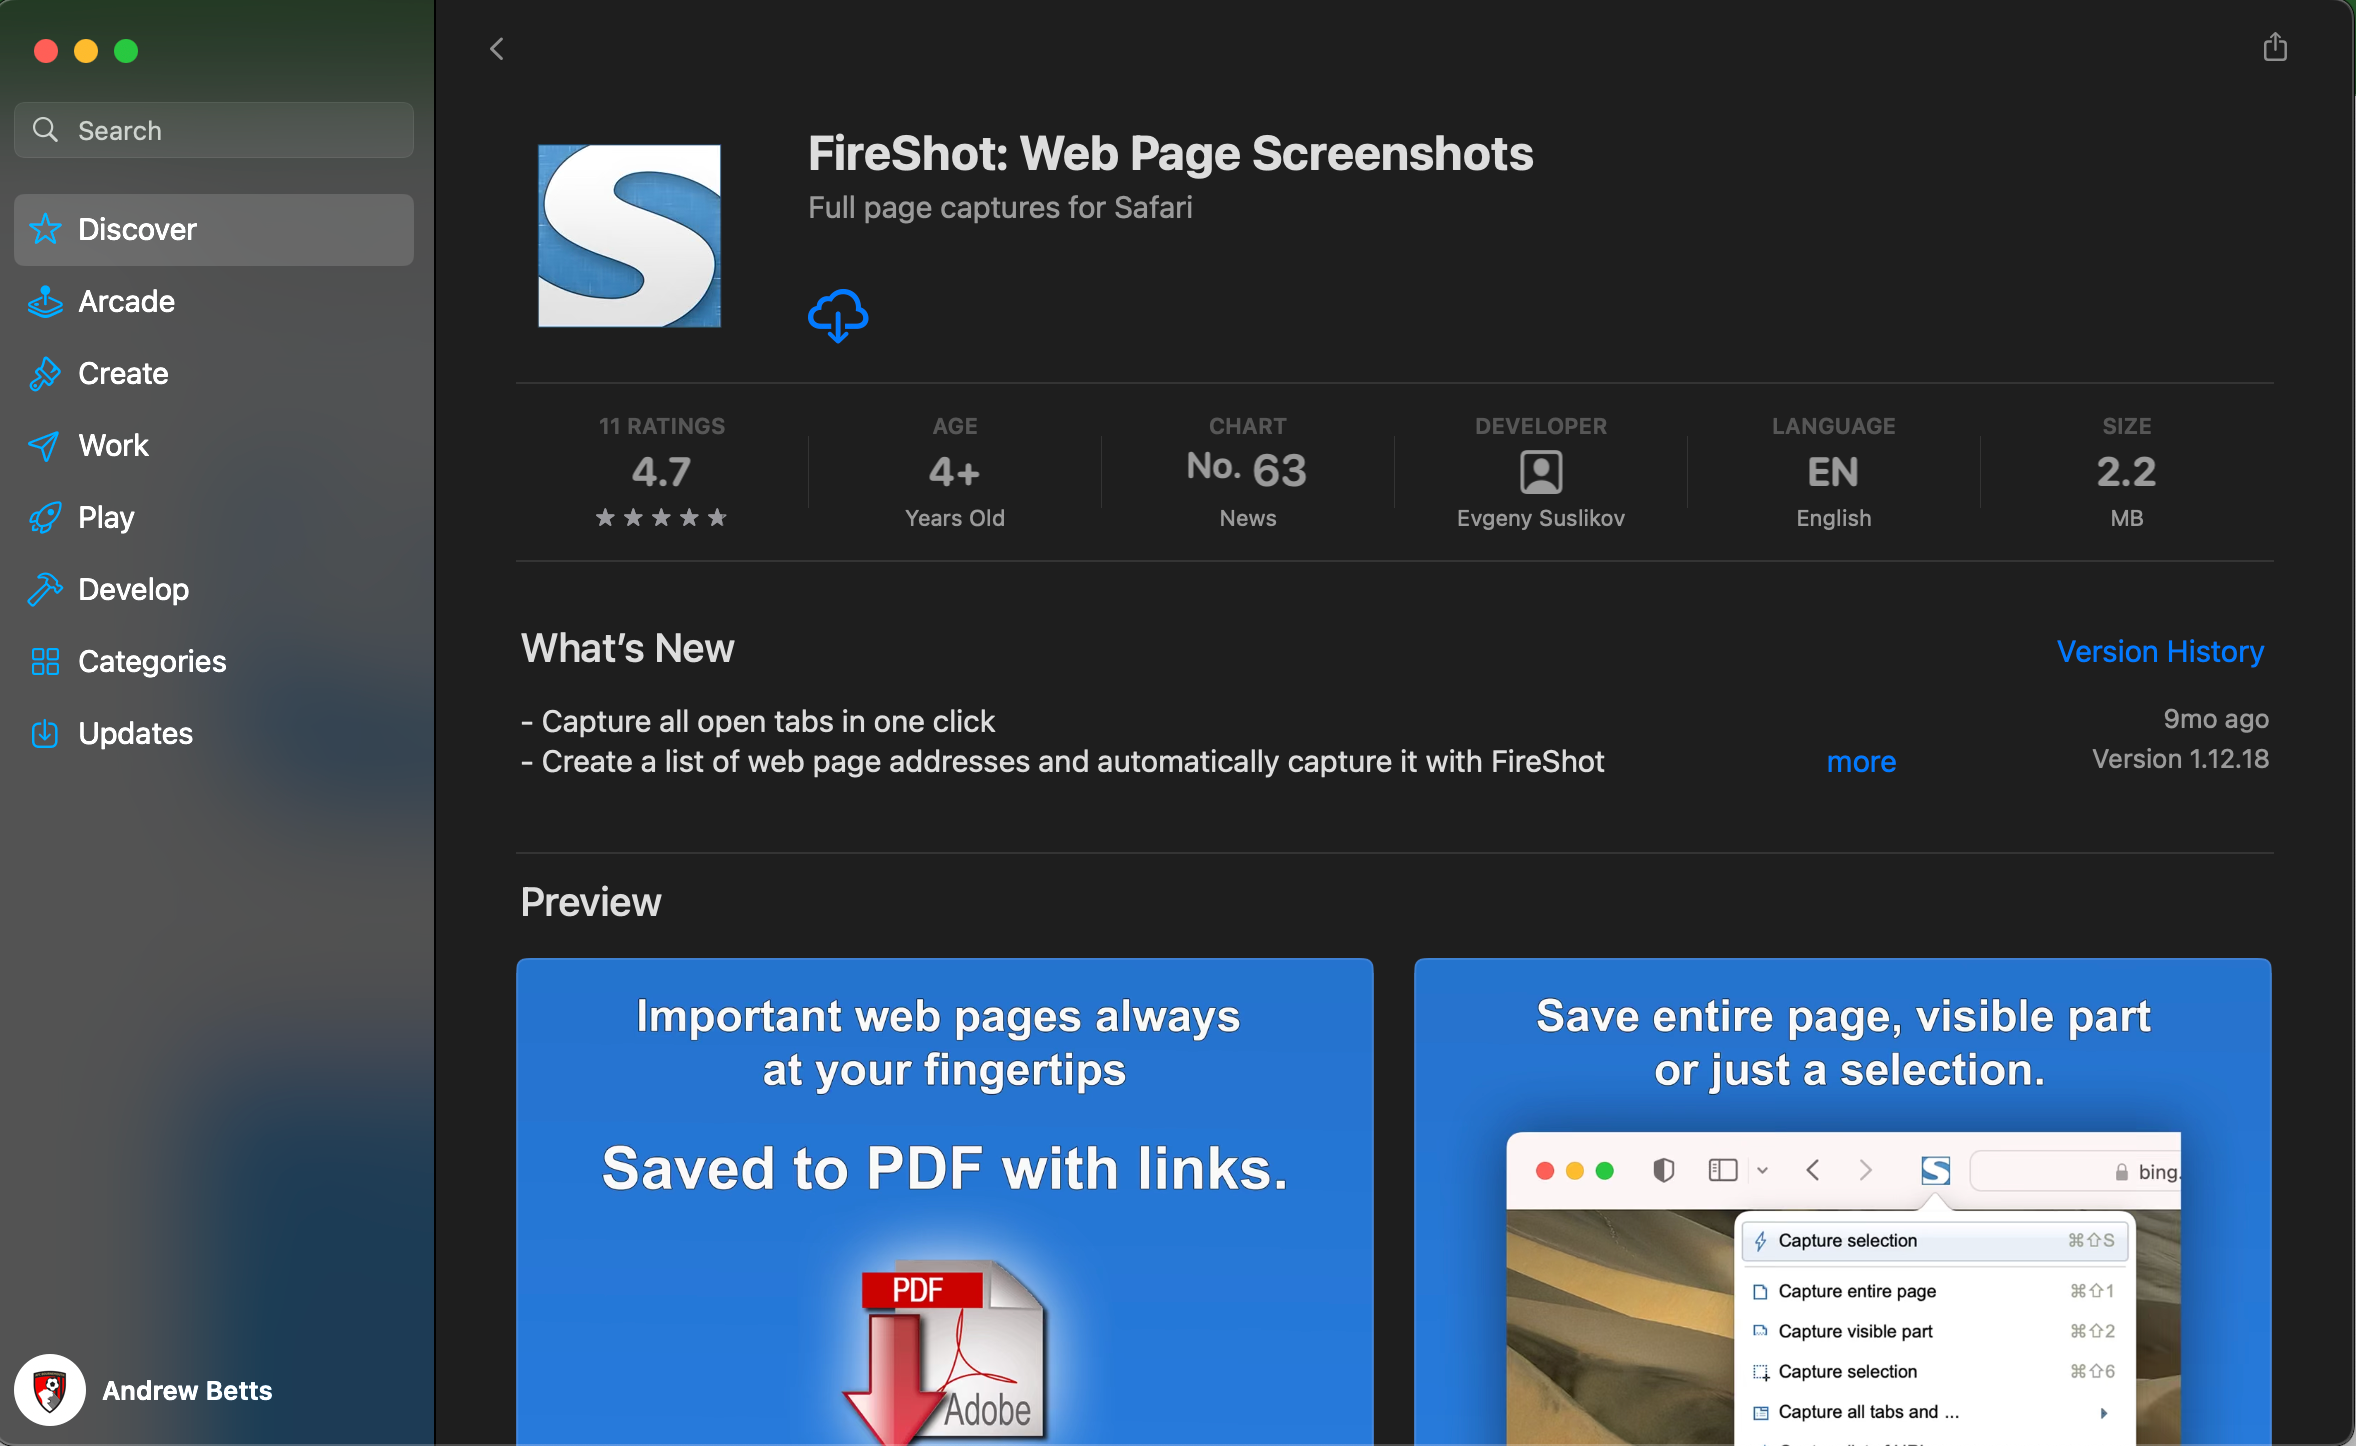
If you take screenshots of websites regularly, then you’ll be better off using an app to handle it. For Safari, you can install an extension to capture scrolling screenshots. The one we like is FireShot, which is free and is also available as an extension for Chrome and other third-party browsers.
Head to FireShot on the Mac App Store and download it by clicking “Get” followed by “Install.”
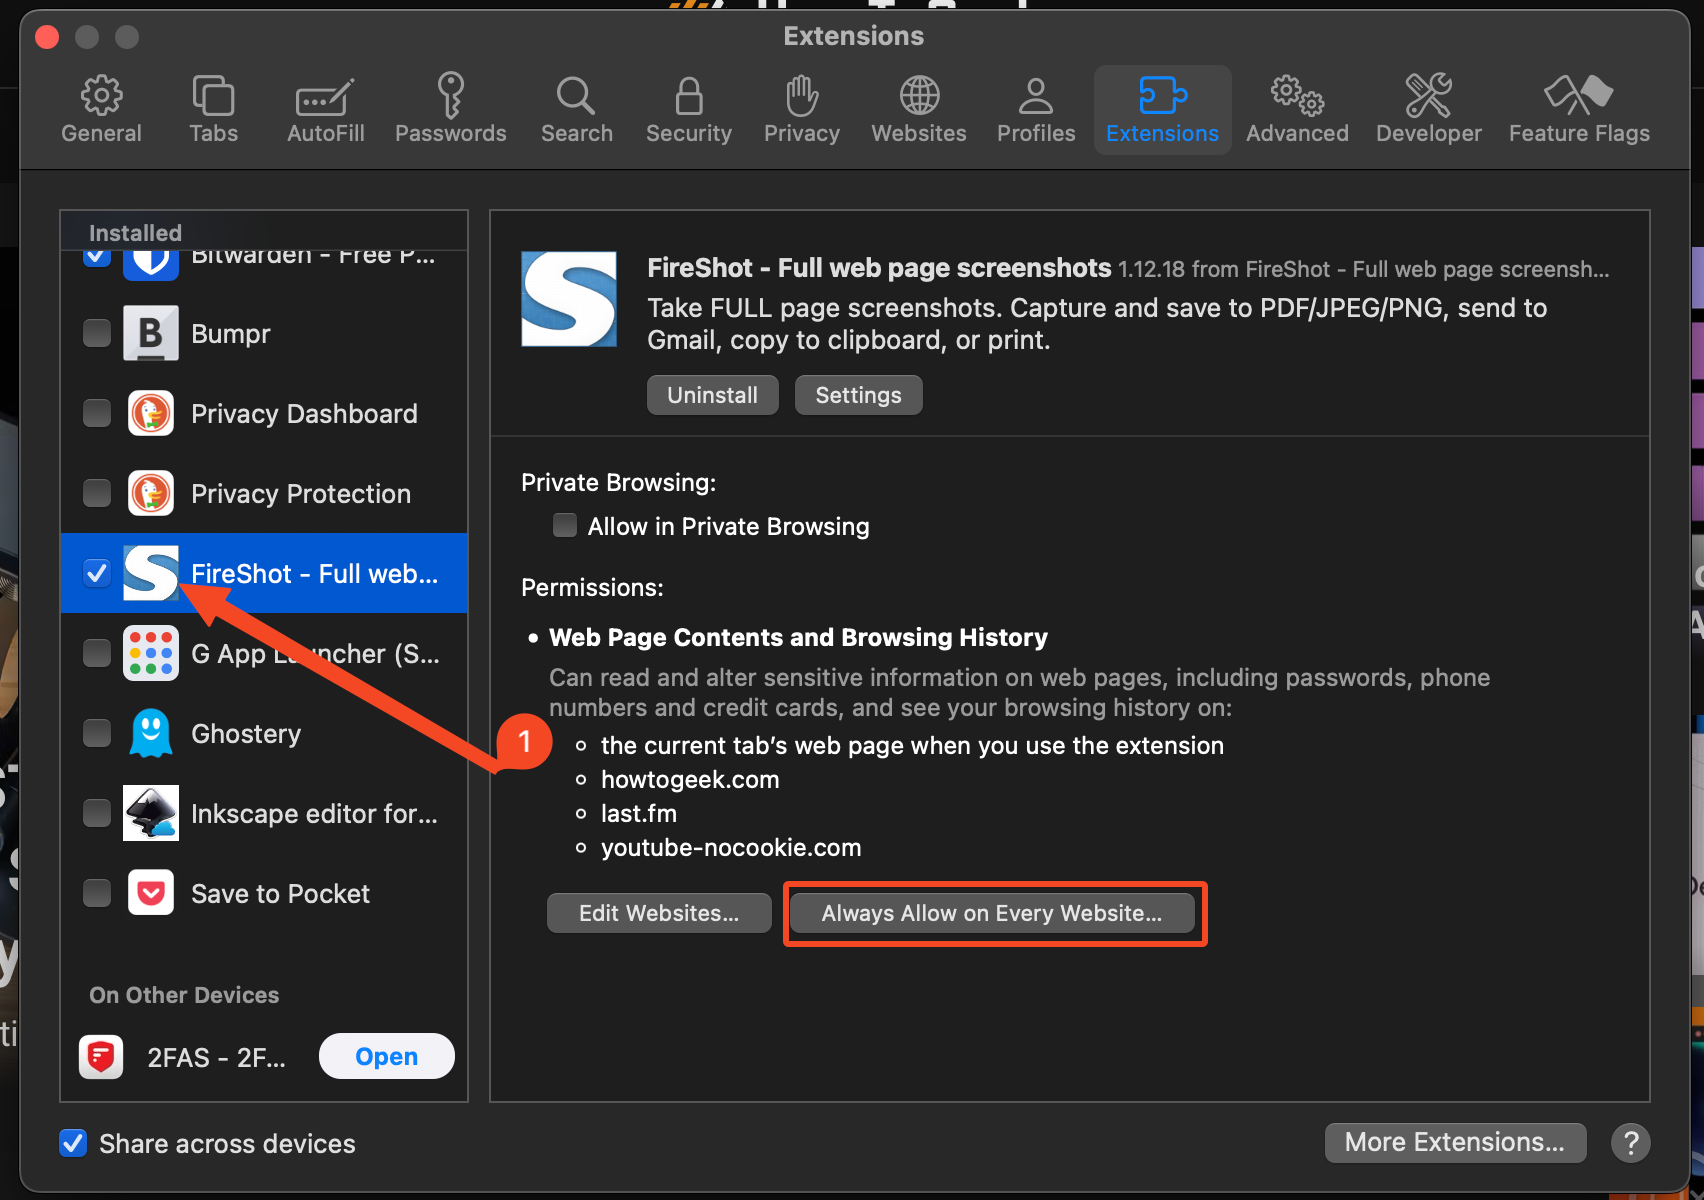
Now open Safari and go to Safari > Settings > Extensions and locate FireShot in the Installed pane. Check the box alongside the name to activate the extension. In the right-hand pane, you can click “Always Allow on Every Website” if you plan to use it a lot. For security reasons, it’s better not to do this. You can simply grant permission for the extension to work as and when you need it instead.
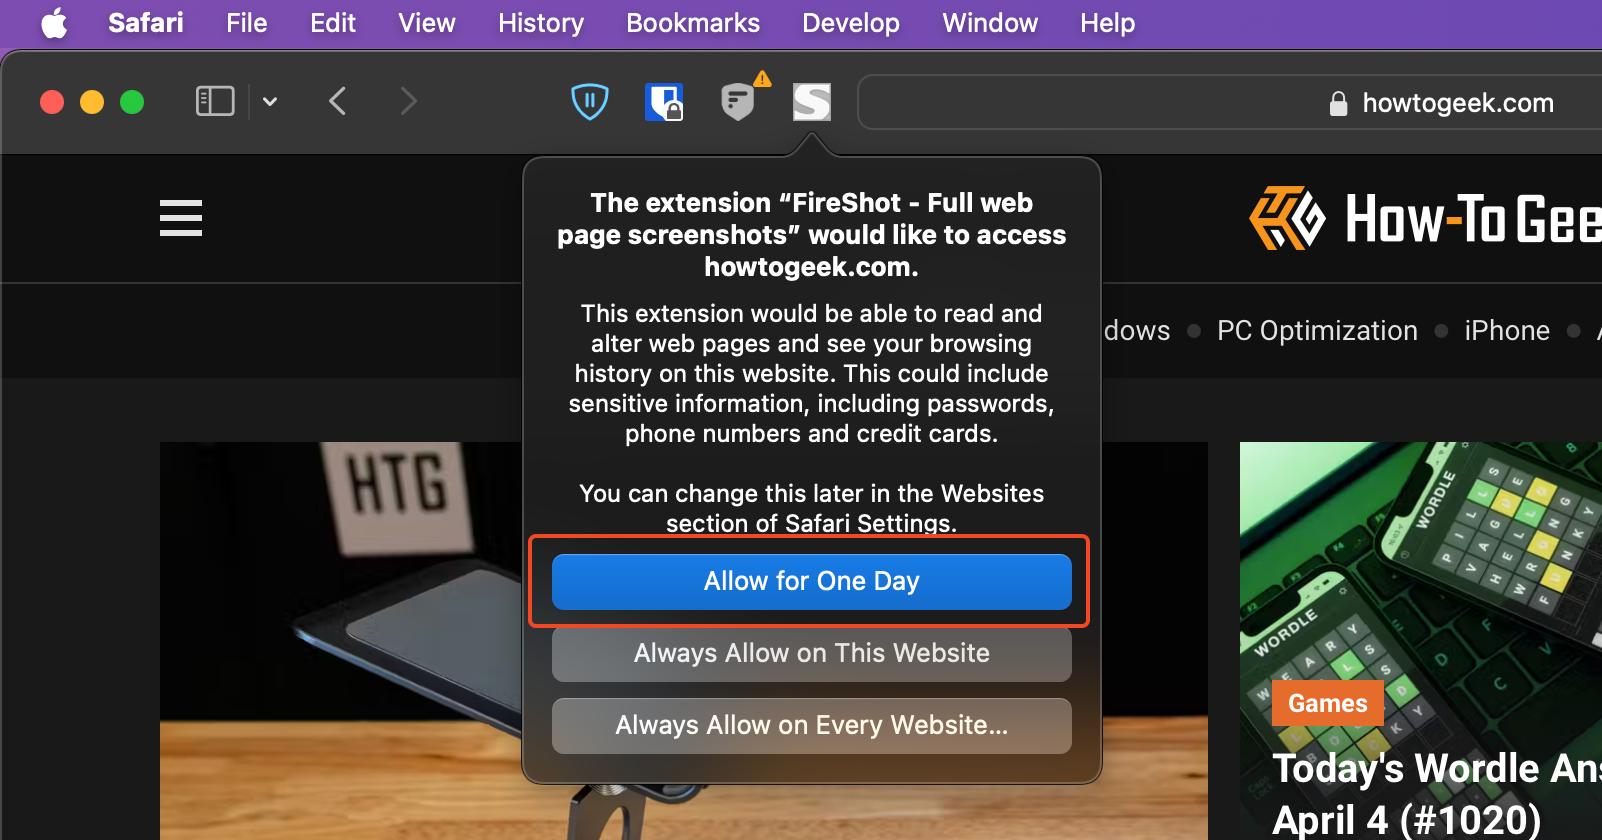
Now load up the page you want to screenshot in Safari. You’ll see that a FireShot icon has been added to the toolbar alongside the address bar. It’ll be grayed out at first, so click the icon and select “Allow for One Day” to give it permission to run.
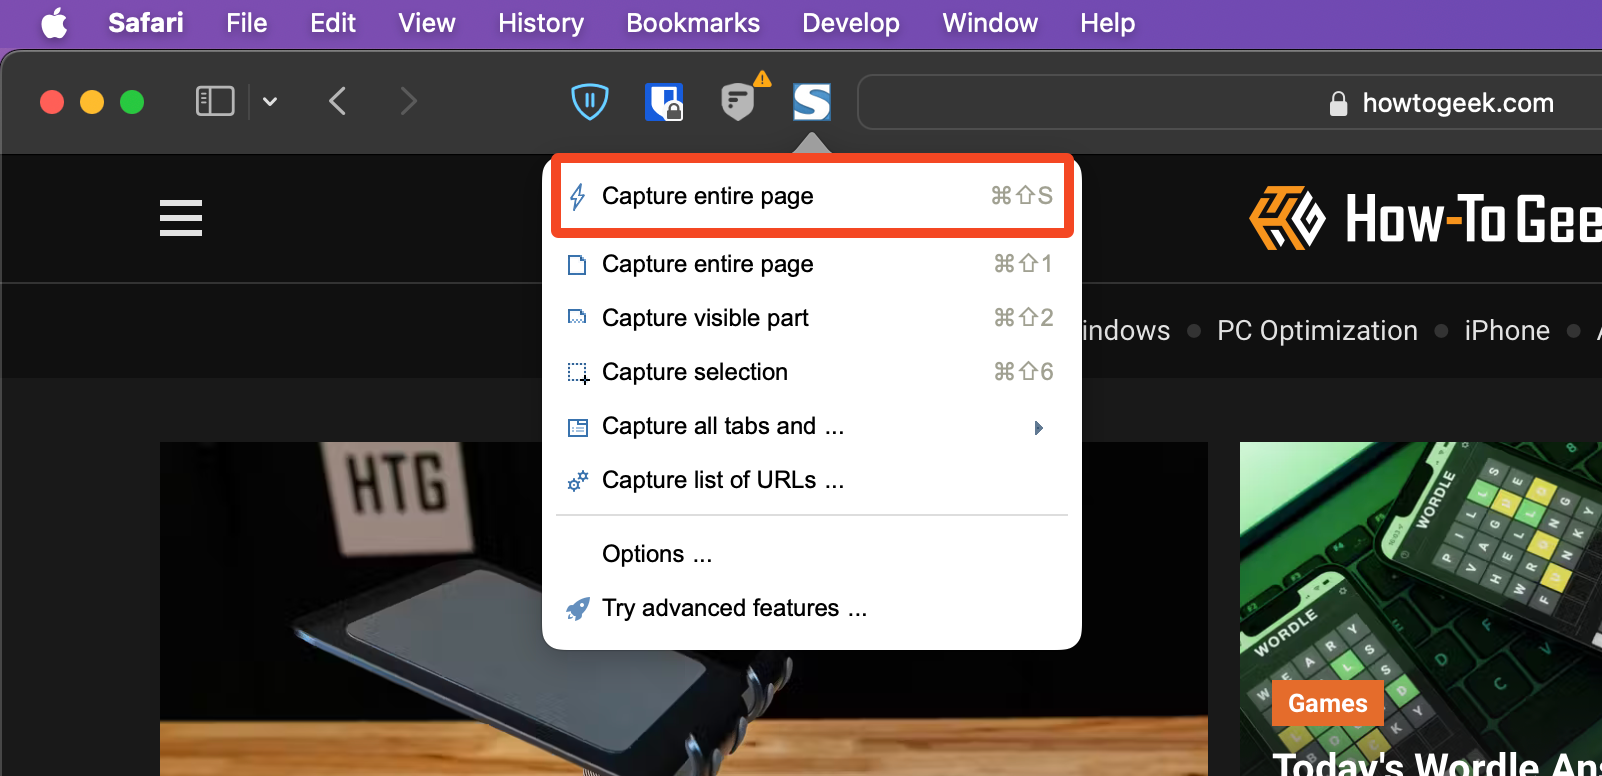
Click the icon again, followed by “Capture Entire Page.” The screenshot will open in a new tab, and you can choose to save it as an image (in the PNG format) or PDF, email it, copy it to your clipboard, or print it.
Take Screenshots in an Online Tool
The other good option for taking full-page screenshots of websites is by using an online tool. This is less convenient in some cases, but it comes with the benefit of being able to share your screenshots between your Mac and another device more easily.
There are many web services that can capture full-screen screenshots of websites. FullPageScreenCapture.com is as good as any. It’s free to use and fast, and it assigns a unique URL to every screenshot it saves, so you can access it through any browser on any device.
Simply head to fullpagescreencapture.com and type or paste the URL of the web page you want to save into the box, then click “Capture Now.”
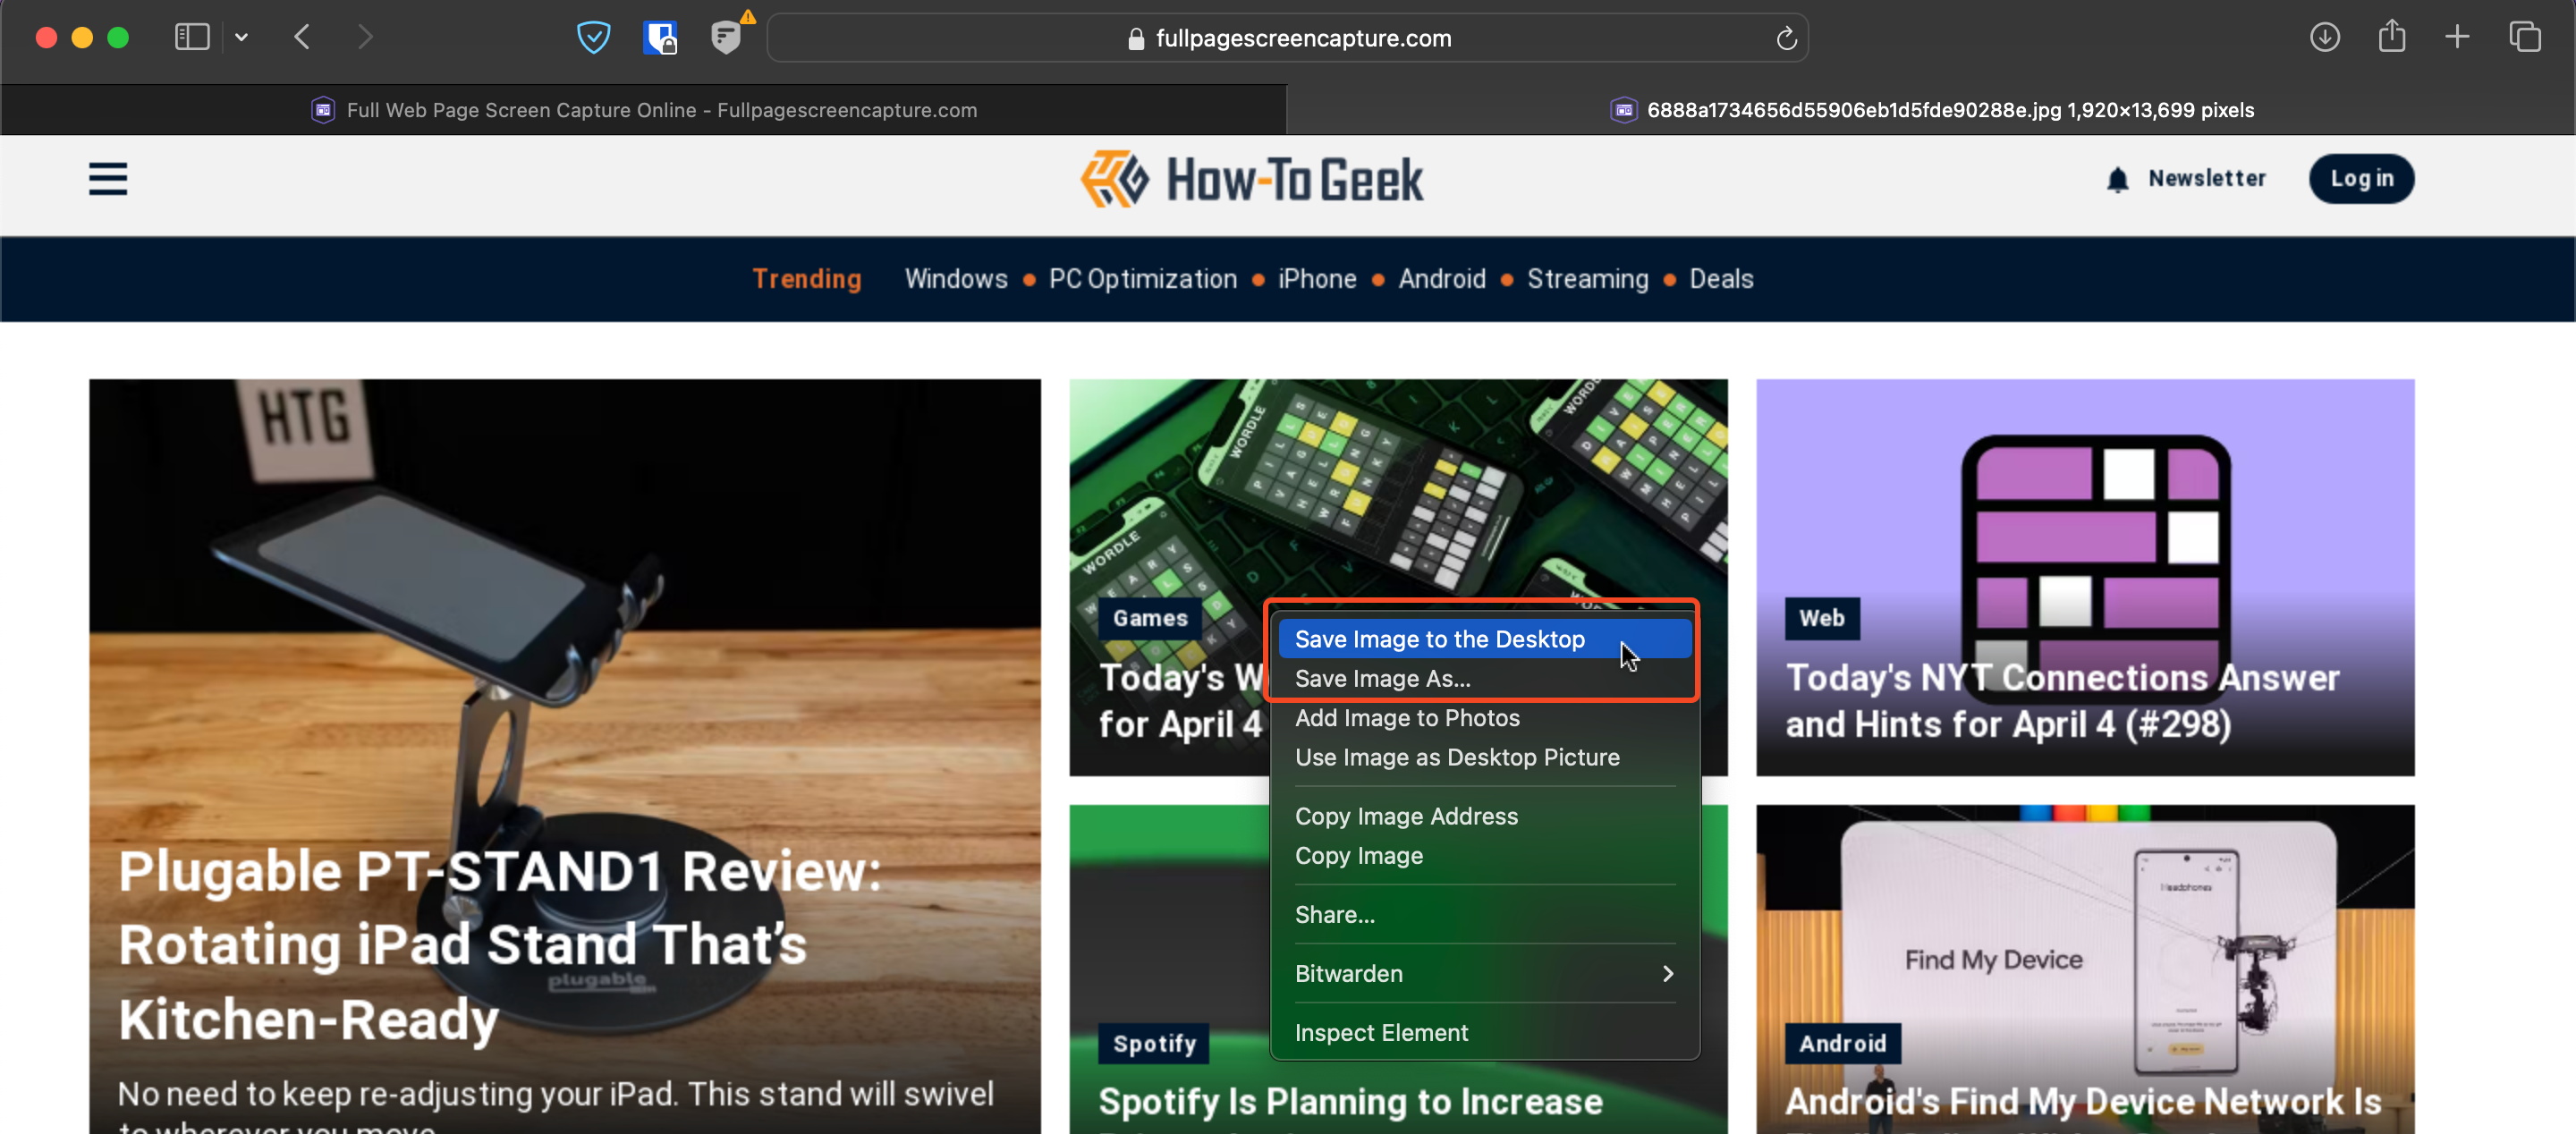
It takes a few seconds to process. Once it’s done, you’ll see the image displayed on the site. Click it to open the image in a new browser tab, then right-click on the image and select either “Save to Desktop” or “Save As.”
You can also click in the address bar in Safari and hit Command+C to copy the unique URL for the image and share it with other devices.
Take Scrolling Screenshots in Any App With Shottr
Finally, if you need to take a full-page or scrolling screenshot from within any app, not just of a website, you can do this with the third-party app Shottr. You can use it to capture screenshots of PDF files, spreadsheets, documents, large photos, or anything else.
You can use the app for free for as long as you like. After 30 days, it will occasionally ask you if you want to pay for it. You’re not obligated to do so, but it only costs $8 and is great value if you use it a lot.
The app isn’t available through the Mac App Store. Instead, download it from the official Shottr website and install it to get started.
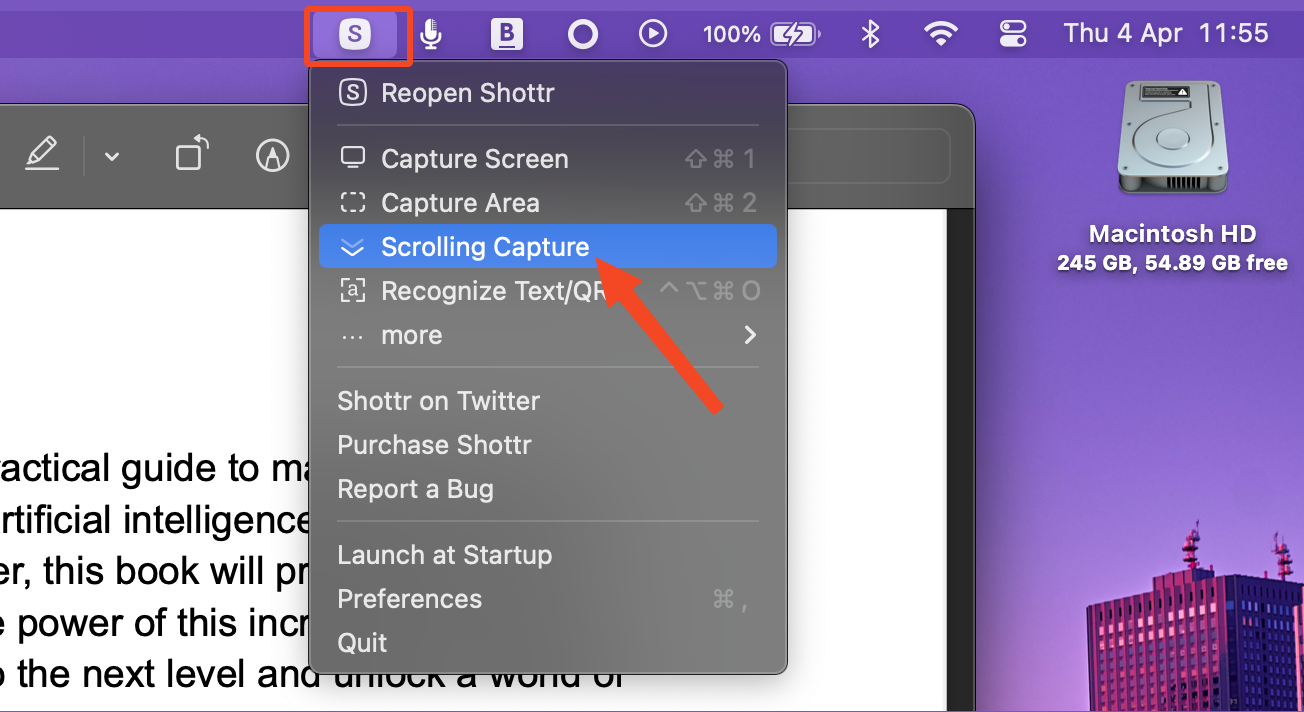
Launch Shottr, and its icon will appear in your menu bar at the top of the screen where it’s always easily accessible. Open the app and content you want to screenshot, then click the Shottr icon and select “Scrolling Capture.”
Your mouse pointer will turn into a crosshair. Click in the top-left corner of the area you want to screenshot, then drag to the bottom-right. When you let go of the mouse button, the screen will begin to scroll up. Everything within the width of the rectangle you drew will be captured, right down to the bottom of the page.
Your screenshot will open in a preview window. You can annotate or crop it, or click the Save icon to save it. If you close the preview accidentally, click the Shottr icon and select “Reopen Shottr.”
It’s easy to take scrolling screenshots on a Mac. Whether you just need a quick tool or a more professional solution, choose the method that’s best for you, and you can grab full-page screenshots in any app.


دیدگاهتان را بنویسید